Friday, March 28, 2014

Cleaning up the Visors

Easy off - easy on and the the process was very straight forward, what a difference some Argent paint makes:


I let the ends and screws soak in phosphoric acid overnight then brushed off the white gunk left behind. I used the high fill primer, sanded lightly and then shot with the Ford Argent rattle can stuff I had left over from the rear bumper refresh.


I decided to refresh the visor latches at the same time ..


Not bad for a few minutes work. I washed the visors and cleaned them with a little comet and then treated with ArmourAll. 

Wednesday, March 26, 2014

Cleaning the Seat Rails and Accelerator Bar

Feeling OK about my little paint process I removed the access covers to the wheel wells, the defroster vent caps, the radio speaker grill, the visors and latches and the rear view mirror. I also took apart the seat so I could paint the metal brackets.

As I was looking at the various parts and brushing off all the loose dirt and rust I could see that some parts could be treated like the Air Vents (Blast, Prime, Paint) but others would need to be treated for rust and then primed and painted. I head read that the seat rail were actually a dark bare metal when new and to acheive the look I would have to dip them in phosphoric acid and then clear coat instead of painting. .

The little jar of Naval Jelly I had used for the vents was never going to work so I set about trying to find where people who do this on a bit larger scale source their Phosphoric Acid. BTW - Phosporic Acid is H3PO4. and once I knew this I found SOOOO many products with varying percentages phosporic acid in them -- too many to list from Jasco Products (the only one I found that was 100% Phosphoric Acid) to pool cleaning supplies.

I spent the next few days reading everything I could find on the web about phosphoric acid, rust removal, and product types. Most everyone on the Ford sites were encouraging me to use either Ospho (75% Phosphoric Acid) or POR-15 (A rust encapsulator).  I looked around and learned Phosphoric Acid is a rust converter like Rustoleum's Extend which actually converts rust to , whereas POR-15 is a rust encapsulator- meaning it does not make rust go away, just keeps it from progressing. I liked the idea of removing the rust and the process of the phosphoric acid converting reddish-brown iron oxide, Fe2O(rust) to black ferric phosphate, FEPOseemed more complete than simply surrounding the rust with a protective shield.

I found an old article on one of the old archived newgroups that explained Milkstone Remover was actually Phosphoric acid and that it could be purchased at any farm supply store. I went down to the corner Tractor Supply and started looking around ... sure enough in the COW section were gallons of the stuff all labeled with 'Active Ingredient Phosphoric Acid ....75%) '

Phosphoric Acid

Ospho (75% H3PO4) costs about $12.00 for quart (Amazon, Lowes, Home Depot, Ace Hardware)
Krud Kutter Rustex  (45% H3PO4) $25.00 for 1 gal
MilkStone Remover (75% H3PO4) $12.00 for 1 gal (Tractor Supply Co. and other farm supply stores - used to clean milking equipment)

The bolts from the seat were rusted and I dropped them into some 15% phosphoric acid diluted , I also brushed as much of the dust and dirt off the rails and dropped them into a 37% phosphoric solution as well. I diluted the solution mostly to increase the volume in order to cover the bigger parts by pouring 1 Gallon into a big plastic container and then adding 1 more gallon of water.

Grungy Seat Rail
Drivers Side
I left both rails in overnight and the next day pulled them out of the solution to let dry. I wiped the white stuff left on them from the solution off with a dry cloth and was pretty much amazed at the outcome. The rust was gone and the color of the metal had turned a rich silver.


Acid washed rails

Driver Side Rail ready for install
I cut new little paper washers out of the thin cardboard of a refried bean box and shot the rails with matte clear coat to give them a little protection.


The rails were looking great and looking in the cab I see the rusted accelerator and brake pedal bars. I decide to clean them up as well since I already have the equipment out. I pull the accelerator pedal by slipping the connector at the top of the bar from the cable end point, and from the engine bay side of the firewall squirt the two bolts with WD-40 and let sit for a couple of hours. I returned and tap the bolts 3 times (to let Old Blue know I need these!) and crank them out 1/4 turn at a time .. uuuuuuggggghhhhh.

Rusty Pedals
After many arm wrenching minutes I hear the accelerator pedal drop to the floor inside  the cab. Idrop the metal into the bucket of Phosporic Acid and take a look at the brake pedal. The connectors are much more complicated than the accelerator pedal and I decide I do not want to pull the master brake cylinder, etc. so I take a spray bottle filled with 15% dilution of phosphoric acid and spray the pedal. metal. I do this a couple of times, wiping off the white residue between treatments and soon the metal is rust free and black.


The next day I took the accelerator pedal out of the bucket and used a wire brush to clean off the little bits of rust and dirt still on the metal, i wiped down the whole thing again. The metal was a soft silver hue and I hit it with a coat of clear and remounted it in the cab.


Monday, March 24, 2014

Blasting and Painting the Air Vent Doors

I had all the new gear and it took a while to get it all setup and me dressed like a beekeeper to sand blast the vent doors. I did not get a blasting box so I made something using the heavy clear plastic left over from another project and a few boxes. This would allow me to contain and capture most of the media and reuse it a few times. I also had read that the noise can cause problems with neighbors so I positioned the compressor behind the garage to reduce the noise for everyone but the sheep in the pasture behind.


The blasting was relatively easy - much easier then using paint stripper and scraping away chemical/paint residue. The effort gave me clean parts and I quickly taped off the plastic and shot it with primer.


I waited a half hour, sanded with 600 sandpaper to get the little nubs off the primer and then used simple Rustoleum Semi-Gloss Black Enamel  to add the color I wanted.


Primer and semi-Gloss Black Paint


Tuesday, March 18, 2014

Old Paint, Rust and the Plan

Everybody and their grandmother has a trick to treating rust in old cars. There seems to be a couple of different ways people approach the problem of rust on floor pans, dashboard elements, vent covers, mirrors, etc. Floor Pans are a science unto themselves and usually result in complete replacement by cutting out old and welding in new and prepping with various sealants to protect the new metal. I do not want to go that far with Old Blue this week, but rather would like to get an idea as to how much rust has eaten through the pans and maybe stop or retard the process if possible. I do want to remove any rust on the various metal components in the cab and treat and repaint if possible to give the cab a bit of a facelift.

Many, many articles exist on the web describing what others have done to manage rust in their old vehicles. Some are product specific and I tended to stay away from those, focusing instead on the blogs and Q&A forums describing recommendations and successful processes for refreshing cab elements.

The most complete process I have found basically strips all paint and rust from the metal; treating the bare metal with an epoxy sealant to retard future rust, prep with sandable primer to fill in any issues with the surface then add a color coat using either 1-stage (color and clear coat in one) or 2-stage (color and clear coat separate). For the small bits in the cab I will use what they call the 'Rattle Can' paint source because I do not have a compressor or the desire (for these small parts) to buy paint in bulk.

The first step after removal of the pieces from the cab is to get the old paint and rust off the parts. Each part had to be examined and looked at as some had plastic parts attached (the vent handles) and others I did not want to repaint because the color is so unique and I could not find a good indication as to what color I could use to refresh the piece (the review mirror on Old Blue is NOT argent like other components or White but instead some kind of pale pinkish /white color unknown to me).

I removed the air vent doors;I have never painted automotive metal before and was a little unsure of the REAL process - it always seemed so magic the way bared metal becomes shiny, glossy, rich looking surface. I had some experience with my bicycles as a kid and knew I didn't have a clue how to get the professional quality results I wanted for Old Blue, though would settle for something just eye appealing.

The vent doors were originally a semigloss black but were now dirty, rusty and held in place against the kick panels by five rusty hex screws. It took some effort to get the screws out, two were stripped and all required positioning my hands in an awkward way to remove. I used a small 1/8" rachet with the help of a flat head screw driver and a crescent wrench to remove the two air vents under the dash.


The screws are rusted as well as the front and back of the cover itself.I gave each screw a squirt with WD-40, tapped each screw 3 times (to let Old Blue know I needed the screw or bolt !) and removed the piece.


For these pieces I will selectively strip old paint, apply rust treatment, and repaint. The screws will be treated similarly. I wanted to take care not to damage the plastic frames but definitely wanted to clean them up and make them shiny black as well.

There are a number of products on the market to remove rust. I looked at the various scrubbers (sand paper/wire brushes), acids (Muriatic/Phosphoric) and blasters (Sand/Glass Bed). All seem to have well documented pros and cons and for this first effort I decided:
  1. Sand Blast off old paint
  2. Use Phosphoric Acid to remove rust 
  3. Prime and paint 
I chose to sand blast because I did not want to use a chemical stripper and I could get a small setup from Harbor Freight for about half the cost of sending the pieces to the local shop. I starting planning the purchase of the compressor, the tube, the blaster, the media (sand!) and protective gear (Jumpsuit, face mask, goggles).

While I wait for the next weekend's sale at Harbor Freight I will try the best known phosphoric acid product known - naval jelly. The screws holding the vents to the kick panel are rusted blobs so I dropped them into a small pool of naval jelly I picked up at Orchard Supply. This brand is phosphoric acid of some unknown dilution but i follow the instructions and for this application it works well.


Vent nuts in Naval Jelly
I let them sit in this juice for an hour and then rinsed well with water per the instructions on the label. The result was better than expected and showed that the original nuts were actually black.

In preparation of my compressor purchase I researched the size and most importantly something called the CFM capacity  of various units at HF. For the small pieces I wanted to blast I would need at least a 10 gallon tank with 120 PSI.

With the standard 25% off coupon available all over the web and a managers weekend sale (On sunday all open box compressors are an additional 50% off!) I was able to get the complete setup for under $150.
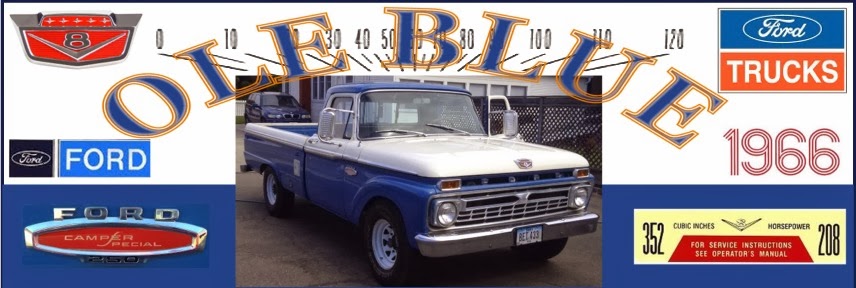


Sunday, March 16, 2014

Rust In the Cab

There is a lot of dirt, dried fluids of one kind or another, and rust in Old Blue's Cab. So this week we will pull out the seats, pull up the floor mat, treat the rust with something, repaint the little bits we can and most importantly, get a good look at the Cab's floor pans and body mounts to see how 50 yrs of weather has affected her.

On the surface Old Blue's cab is in relatively good shape. While perusing the Ford Enthuiasts, H.A.M.B and other Slick 60's Ford Truck oriented websites over the past 8 months I have seen pictures of trucks that basically have no floors or supports left in them after 50 yrs of weather and use. But Old Blue looks pretty good at least from underneath and from the outside but I really will not know until I look under the floor mat and see whats there. So ... to get to the floor boards I will need to pull the seats out, remove the gas tank switch knobs (Old Blue has 2 aftermarket fuel tanks riding under the front of the bed), remove the door jam rails (Custom Cab option !!!) and carefully remove the floor mat which has laid for 50 yrs.

Here is what I can see without doing anything .. The floor mat is almost black with dirt, there is surface rust on most parts and the paint is chipping or gone on the vent covers.

Drivers side floor mat

Another view of Drivers side floor mat

Drivers side - rust on sun visor mount

Passenger side - rust on sun visor mount


Rear view mirror 


Speaker Grill


Drivers Side Air Vent


the drivers side seat rails and mounting bracket
Passenger side seat rail and mounting bracket
The rails under the seats are dusty. dirty and rusted from years of work. I shot the 4 bolts on each side with WD40 and let stand over night, tapped them each 3 times with a hammer and then used a rachet with a LONG extender on the back 2 and a flat crescent wrench on the front two to remove the bolts. 

Now I could see parts of the the floorboards and they were not bad for a 50 years old truck that has traveled extensively and lived in northern California, Oregon, and Iowa. 
Under the seat 
 The matting was brown and dirty, stained from years of use. I have read that pulling these mats can be difficult and that they have a tendency to crumble to little pieces if moved at all. I decided to take a chance and pull it up to better clean it with soap and give it a good shot with the power washer. To do this I also had to remove the tank selection switch located on the floor next to the drivers side door. The two bolts received the same treatment as the seat bolts and easily let loose.   

Drivers side floor pans
Under the mat the floorboards were pretty thin in some places and the rust had accumulated in flat chunks in the corners and along the sides of the floor pan. At the point the floor meets the side wall on both drivers and passenger sides the rust has eaten through the floor pans in small (pen point size) areas. I vacuumed up the rusty bits of metal laying around the floor plans and treated with 15% solution over night. The next day I treated again and let sit. This evening I wired brushed the floor pans removing last bits of rust and then sprayed with Eastwood's 2k Epoxy primer to give it some protection.