Saturday, April 19, 2014

The License Plate Light

While painting the back bumper I had noticed that the license plate light was not working. I did not know if it was the bulb, the housing or the wiring but today I decided it was time to find out and keep Old Blue legal for night time cruising.

I started by taking a close look at the housing as in order to get to the bulb I would have to disassemble it. There was a single small screw to lift up the top of the frame and the heavily painted bulb cover. I could not get the screw loose as it was rusted and when I looked to take the complete housing off the bumper to make disassembly a little easier I saw that the two small bolts and nuts were also heavily rusted. I shot all 3 with WD-40 and let sit over night.
The light behind protective bar
The next day the nuts, bolts and screw were just as tight. I took a closer look at the setup and decided to find out more about the light housing and the bulb. The housing had been painted over 3 or four times in silver paint and then had rusted over the last 50 years so it was a mess - maybe it made more sense to just cut the whole thing off the bumper and buy a new one?

A quick search through the FORD F-250 Manuals showed me the part number was "C3AZ-13550-1157"  and that this part was identified as a alternate for the round button shaped license plate lights used on trucks sold with rear bumpers and identified as the correct light for 'bumperless' trucks.
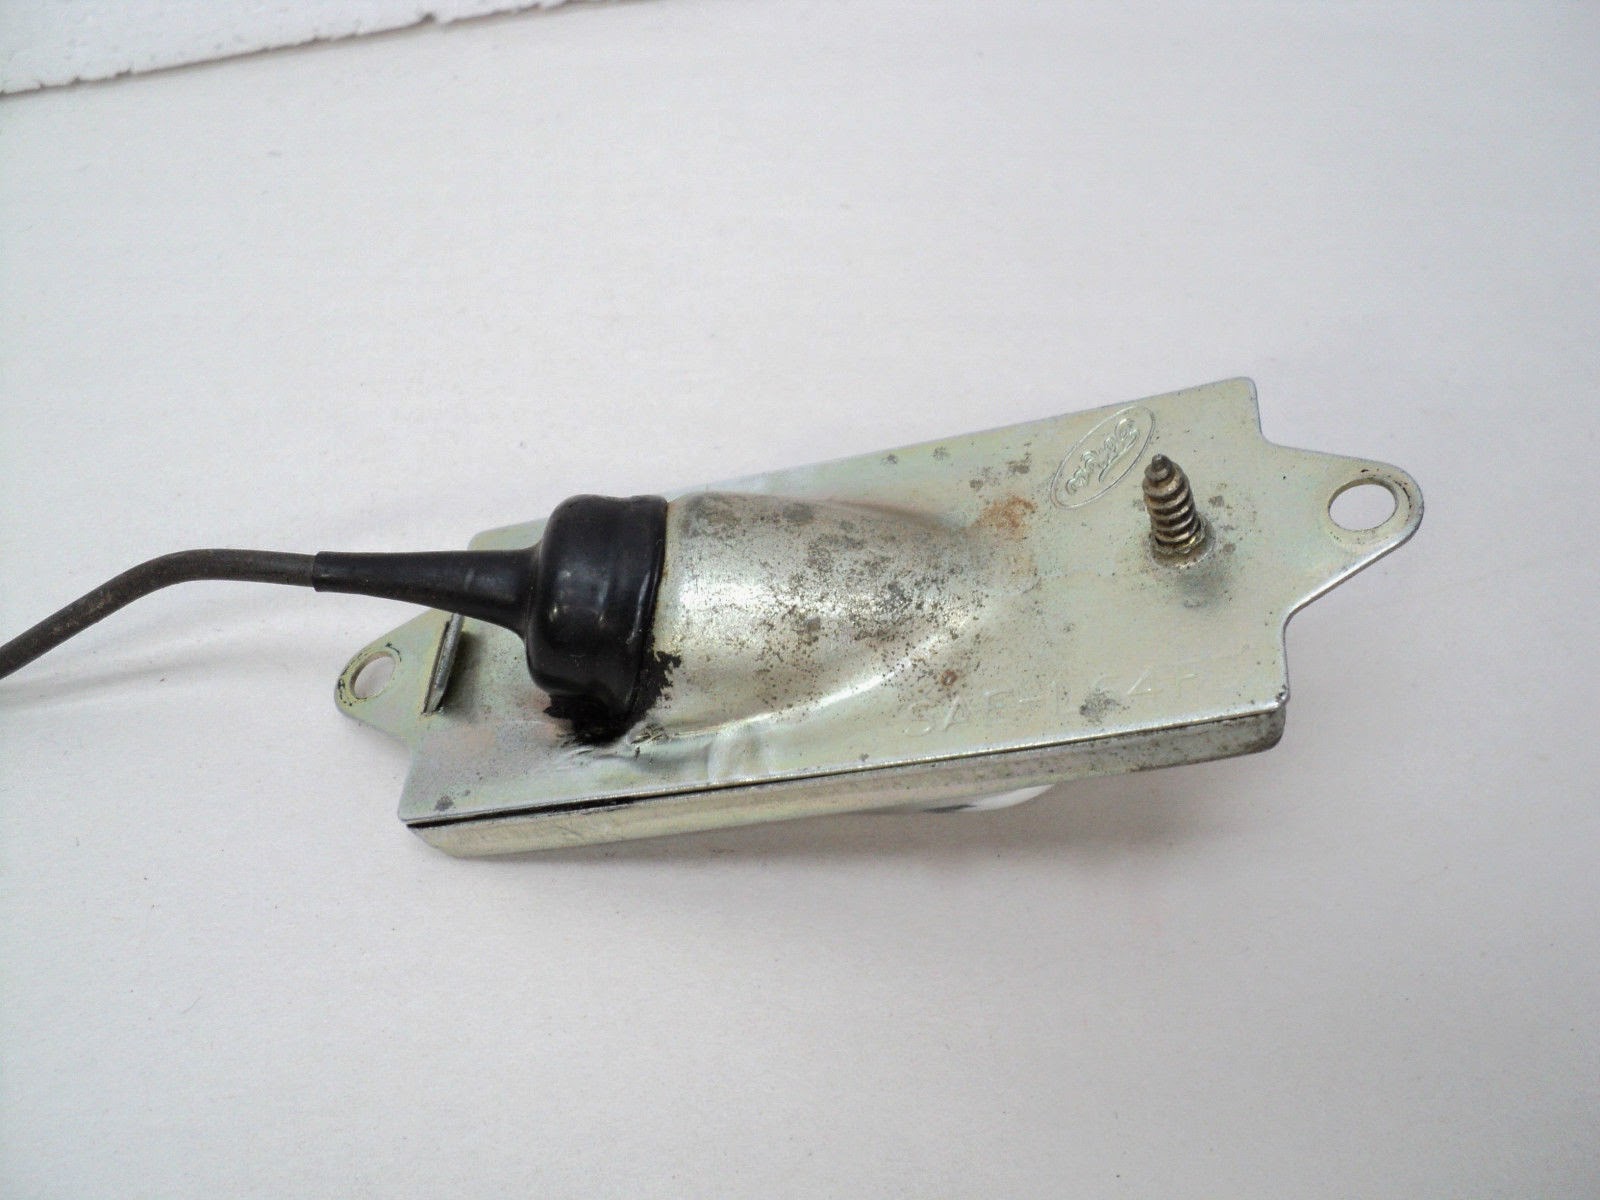
Original Lamp Housing

We know Old Blue has an aftermarket bumper as FORD did not offer a step bumper in 1966, so the part looked correct. Searching on EBAY I found a used one for $29.99 + $19.55 shipping (WOW!) that would be $50.00 for a replacement!
From http://www.fordification.com/.


I decided to search on the part number number and found that 65 Mustangs, Rancheros, Falcons all  had used the same housing but with a substantially shorter cable. I found one on EBAY for about $18 with shipping. I guess I could use this for Old Blue with a few modifications but decided I would try to salvage the rusted, painted one currently on the old truck.

Rollling under the back bumper I put a socket wrench on the old nuts holding the light housing to the back bumper and gave it a good twist .... the bolt snapped in half just behind the nut ,,,hmmm .. that worked out O.K. will the other do the same? I tried the second bolt and yep, it also snapped in half right behind the nut. I grabbed a punch and a hammer and gave the remainder of the bolt a soft whack and it pushed through the bumper and the housing and dropped the ground near my legs, the same for the other bolt and after 50 years the light housing was loose from the bumper. I firmly grabbed the housing and using the largest screw driver I had I carefully unscrewed the single screw holding the glass bracket to the housing. As the screw backed out the glass bulb cover fell into my hands along with the remainder of the bulb. The bulb  was almost nonexisitent having fallen to bits over the years. I laid the glass shade aside and dropped the glass bracket into a jar of Phosphoric Acid for an overnight soak. I took a closer look at the bulb and noticed it was labeled with 83, so later that night I took a ride over to the local Autozone, O'reilly's and Napa stores. None of these stores had type 83 bulbs so I wondered if this was the right bulb for the 12v system on Old Blue or had this been a just in time replacement ?

While sitting in the parking lot of the Napa store I googled for the part number 13550 and found a conversion table at the fordification.com website. Here I found the recommendation to use Industry number bulb 97 which replaced the FORD part no. C3AZ-13466-G. I went inside and bought 2 type 97's for about $5.

Having pulled the glass holding bracket and glass bulb cover I took a closer look at the light fixture. It had a single cable coming from somewhere behind the bumper that ran through a waterproof plastic holder, through the metal mounting clip through another plastic washer terminating with a brass cover. The parts were all rusted and covered in dirt.
Back plate with power feed


Back plate with bulb removed
The back plate had a rubber gasket to keep the water out which I removed because it had deteriorated over the years.I cut out a new one from some old rubber inner tube I had laying around and replaced the bulb with a Type 97.
New Gasket 
I buffed the glass lamp cover and the outer frame and found a couple of bolts, locking washers and nuts to remount the assembly.
Ready for Re-Assembly
Remounting was straight forward and when It was complete I fired up Old Blue, turned on the lights and ran back to take a look at my handy work - OH NO .. the light did not work.

After shutting down the engine and turning off the lights I rolled under the back bumper and followed the wire from the light assembly back to the connector plug into the wiring harness just as the wiring diagram had indicated. The cable had been extended so the bumper could be moved out under the old camper that Uncle Ken used to have. The wiring looked fine with no breaks so I pulled the harness connector plug and sanded the connector shiny, and reinserted it.

I fired up the engine again, turned on the lights and ran back to take a look.and PRESTO! the light was shining bright! Job Done.
Working License Plate Lamp


[This document shows how to remove the rear license plate housing and replace the bulb on a Ford F250 Truck]

Sunday, April 6, 2014

Finding Out Why the Wiper Switch Does Not Work

Old Blue's windshield wipers stopped working in December while we were driving out to Point Reyes for a soccer game. The rain was light so it really didn't matter much and we do not plan to drive her in the rain but I was curious why they just stopped responding to the turn of the switch.

1966 F250 Camper Special Wiper Switch

Checking around the web I find some additional info regarding the '66 Ford Truck setup. Some '66's have the windshield washer switch integral with the wiper switch. Some (if equipped) have a separate push button washer switch above the ignition switch. Some have a foot activated floor mounted pump.

In 1966 both single & two speed wipers were available. If you can only turn the wiper switch one 'click' you have the Single Speed switch. If you can turn the switch twice it is a two speed switch. Old Blue has a 2-speed switch and pulls out which should control the washer function. However, Old Blue ALSO has the push button above the ignition key and it is wired to the the washer motor through the firewall but not grounded. I will have to check this out someday.

Removal:
It took a while to figure out how to remove the switch from the dash. Once you get it the procedure is quite simple, as follows:
1. Remove Knob : This is done by pushing a small screwdriver into the slot at the base of the knob, releasing the metal catch inside from the groove on the switch post and pulling knob gently off post. It took me a few times to feel the metal catch inside the knob with the screwdriver and to figure out how much pressure to apply (not much is needed) and when the latch slips the knob easily pulls off the post.

Slot to release catch
'D' shaped pressure catch inside knob
This same knob is used for other controls on the dashboard; I practiced with the heater control because it was easier to get to until I figured out where and how much pressure was required to release knob from the post.

2. Remove Bezel nut: I decided to remove the switch from the dash and then get underneath the dash to remove the wiring. the switch is seated in the dash by a simple slotted screw. I took a large flat screw driver and gently pushed counter clockwise on the slots - the screw spun right off.

Wiper switch bezel and retaining nut

The silver bezel marked 'Wiper' just lifted off the post and underneath the Wimbledon White paint was unfaded or marred. I could just imagine what Old Blue's dash looked like when she came off the assembly line.

I reached my hand up under the dash and gently pulled the switch and connected wires down a little so I could take a look at how they were attached.
You can see the 'gap' between the female connector and the switch housing

There are 5 wires connected to the switch and after looking carefully I notice the black parts are a male-female connector.

I gently encouraged (with my flat head screwdriver) the male connector out, turning the switch to expose three different leverage points and applying minimal pressure to each to move the parts (I was worried I might break the old, brittle plastic bits) until the switch fell lightly into my hand.

Turning it over I noticed how grungy and dirty it was and that the female wiring connector was loose from the switch housing. Leaving a gap along one side about 1/8" wide which I could close by pressing the wiring connector against the housing. It sprung back when I released the pressure. Hmmmmmmmm

Holding the switch in my hand, I could turn the post from left to right and back, feeling the two clicks but I noticed that when I pushed the connector against the housing the clicks were solid and when I let the pressure off the connector allowing it to 'gap' and then turned the post the clicks were almost non-existent.

Cleaning:
I shot the switch through the 'gap' between the housing and the connector with electrical contact cleaning fluid, worked the switch back and forth a few times and then repeated multiple times. I let it dry and then with a damp cloth wiped all the gook and dirt off the exterior of the switch. Moving the post again, the switch was moved much more freely now ...

While I had the knob off the post I thought I would figure out how to clean it. These knobs on Old Blue are ALL caked with a white substance that fills the grooves in the knob (see in pics above) and I have tried various cleaning products and brushes to get this stuff off the knobs but nothing seems to work very well.
Electrical Contact Cleaning Fluid 
The cleaned switch

I dipped the knob in water and took a toothbrush and brushed the grooves - after drying, the white stuff was still there. I took a wooden toothpick and ran it along the inside of the grooves - this removed the white gunk so I laboriously did this multiple times in EACH groove removing the white gunk and leaving the knob black and shiny. Sometimes elbow grease is the only answer ...

Mind The Gap:
I looked closely at how the connector was attached to the housing and saw 4 metal tabs on the housing that were pressed against the plastic edges of the connector. On the side with the 'gap' the 2 posts were loose from the plastic, allowing the connector to retreat from the housing. Taking a pair of wide mouth pliers I positioned the teeth of the pliers to just set on the metal posts, pressed the connector solidly against the housing and applied pressure - lots of pressure - to bend the little posts against the plastic. After a few times of doing this with both posts the connector stayed solidly seated  against the housing.
Re-seating the retention tabs to 'Close the gap' 
Re-Installation:
Putting the switch back into the dash was straight forward now that I knew how the various pieces fit together. I connected the wiring harness to the switch, fed it back through the hole in the dash, put the bezul on (there is a little nub on the back to help with alignment of the bezel) and screwed the retaining nut back into place using my screwdriver for the last bit to ensure it was tight. The knob slipped right back on and clicked into place.

I fired up old blue not knowing if I had fixed anything and moved the wiper knob to the right 1-click. The windshield wipers started moving back and forth - EUREKA !!!

I moved the switch to the second position and watched as the wipers picked up a little speed and then turned the switch back to the left and watched as the wipers gently glided to their resting place on the windshield. I repeated just for fun with the same results and felt lucky the problem was probably that the 'gap' allowed space to come between the metal sliding connectors inside the switch keeping them from completing the circuit OR maybe some gunk in the switch that had been blown out when I shot it with contact cleaner.

Information:
Once again Bill from the Ford Enthusiasts website has something to say about these switches:

C6TZ-17A553-B .. Two Speed Wiper and Windshield Washer Switch-terminals, includes w/shield washer switch / Marked: C6TB-17A553-B (Motorcraft SW-736)/ Obsolete

Applications: 1966 F100/350 from serial number 760,001 / 1966 F500/950 from serial number 802,001.

The serial number is the last 6 digits of the VIN, use this to verify the switch you need.

[This document shows how to remove the wiper switch from a Ford F250 Truck]

Saturday, April 5, 2014

Cleaning & Painting the Seat Hardware


While I had the seats out of Old Blue I separated the backrest from the seat, masked off the vinyl with newspaper and sanded, primed and repainted the metal bits that allow the seat back to swing forward to access behind the seat. The black paint had been chipped over the years so a little cleanup would look nice.. I also dipped the handle to the gas tank selector switch (Old Blue has 3 tanks) in the magic rust sauce and cleaned and repainted the selector indicator panel that sits on the floor next to the drivers seat.

Separating the backrest from the seat bench was a simple affair with the backrest support arm connecting  to the seat bench pivot point by a little rolling pin that was secured by a cotter pin. Turning the seat upside down I gained easy access to the cotter pins (one on each side), pulled them, then pulled the little rolling pins out of the side of the seat bench giving access to the support arm on the seat back and metal bumper on the bench to sand, prime and paint.

Repainted Seat Hardware


Support arm and Tank Selector


TOOLS:
Because I had already removed the seats this task was simple. It required a pair of pliers to remove the cotter pins and some paint. I used the same paint used for the radio grill and vents - Rustoleum Semi-Gloss Black and Dupli-Color High Fill Sandable Primer.

Thursday, April 3, 2014

Painting the Radio Grill and Defroster Vent Caps

After removing the seats, floor mat, radio grill, defroster vents from the cab I washed the floor mat with the power washer getting most of the dirt off. I cleaned out all the loose rust from the floor boards and pans and from under the seat and treated the metal with phosphoric acid - letting it dry in the warm spring sun. For the metal parts I followed the same process as I used for the Air Vents by
  1. Bead blasting the part
  2. Treating rust with a 24 hr dip in 25% phosphoric acid solution
  3. 2 coats of high fill primer 
  4. light sanding to get off the rough spots with 600 grit samdpaper 
  5. Finished with 2 coats of  semi-gloss (Satin and Gloss were too bright) black rattle can paint which actually went on very smooth. 
but decided to add a couple of variations to see what happens when I
  1. heat the component after painting
  2. sanding after last coat of paint with 1200 grit wet sandpaper
  3. buffing after the last coat of paint.  
The radio grill was a bit of a puzzler right off the bat as I quickly realized that turning the screws wasn't releasing the grill from the dash, reaching up under the dash  I feel that the screws holding the grill on the dash also held the speaker and screen under the dash and were secured with aluminium wingnuts. I spun off the wingnuts, rested the speaker on the heater cables under the dash and lifted off the grill from the dash.

For the Grill and vent caps, I bead blasted the old paint off  and dropped it into the phosphoric acid solution and the next day, sanded off the remaining discoloration and paint bits. I also threw the screws into the same solution.  I painted 2 coats of primer and sanded lightly with 600 grit sandpaper to get the nubs off.

Grill 


Removed from dash

Primed with high fill 


After spraying 2 coats of Semi-gloss black enamel I baked in the oven at 225' for 1/2 hr. The heat must have been to hot as the paint bubbled. So I sanded off the paint and most of the primer, re-prepped and re-painted; this time baking at 175' for 1/2 hr. The paint was hard and flat and I liked this outcome.

Baked Grill

I primed and painted the defroster vents ...
Primed vent caps
Variation #1: After painting the vent caps I then tried to sand them with 1200 grit sandpaper. This was an exercise in futility (it didn't work!!) as the sandpaper scratched the finish and left a white glaze on the paint. I want to learn how to use fine grain wet sand paper to get a hard shine on enamel paint. I will have to read some more about this process and try again.

Variation #2: So, I sanded the vent caps back down to metal, re-primed and painted and this time I buffed with fine compound by hand with a damp cloth. I liked this outcome.

Buffed vent caps


I then re-installed the grill and vent caps back into the dash.


TOOLS:
The screws required a phillips head screwdriver and I used my hand to hold the wingnuts.  I used the same primer and paint used for the kick panel vents - Rustoleum Semi-Gloss Black and Dupli-Color High Fill Sandable Primer for the dash metal. I used the oven in the house (there really wasn't any smell) and the compressor and bead blaster I had procured earlier to strip the old paint off the metal.